The start of the design process can vary greatly, some product designs will be received taking into consideration all aspects of the moulding and mould design process, but this is not always the case.
This is where our experience can help guide a project from concept to a production ready product through proven processes.
DFM – Design for Manufacture
The first stage is a review including but not limited to, draft, split lines, undercuts, gate position, ease of fill, machining methods, location and ejection function, along with any suggestions that could simplify tool manufacture and decrease production cost which is always a benefit to the customer. This is supported by our in-house moulding process simulation software which can be of great benefit early on and can help with decisions such as where and how you would like to feed the plastic to fill the product.
All product design is carried out on the latest version of Solidworks. Models can be supplied in a variety of standard formats including Parasolid, STEP, STL and more. Fully detailed component drawings can be supplied in DXF or DWG file types.
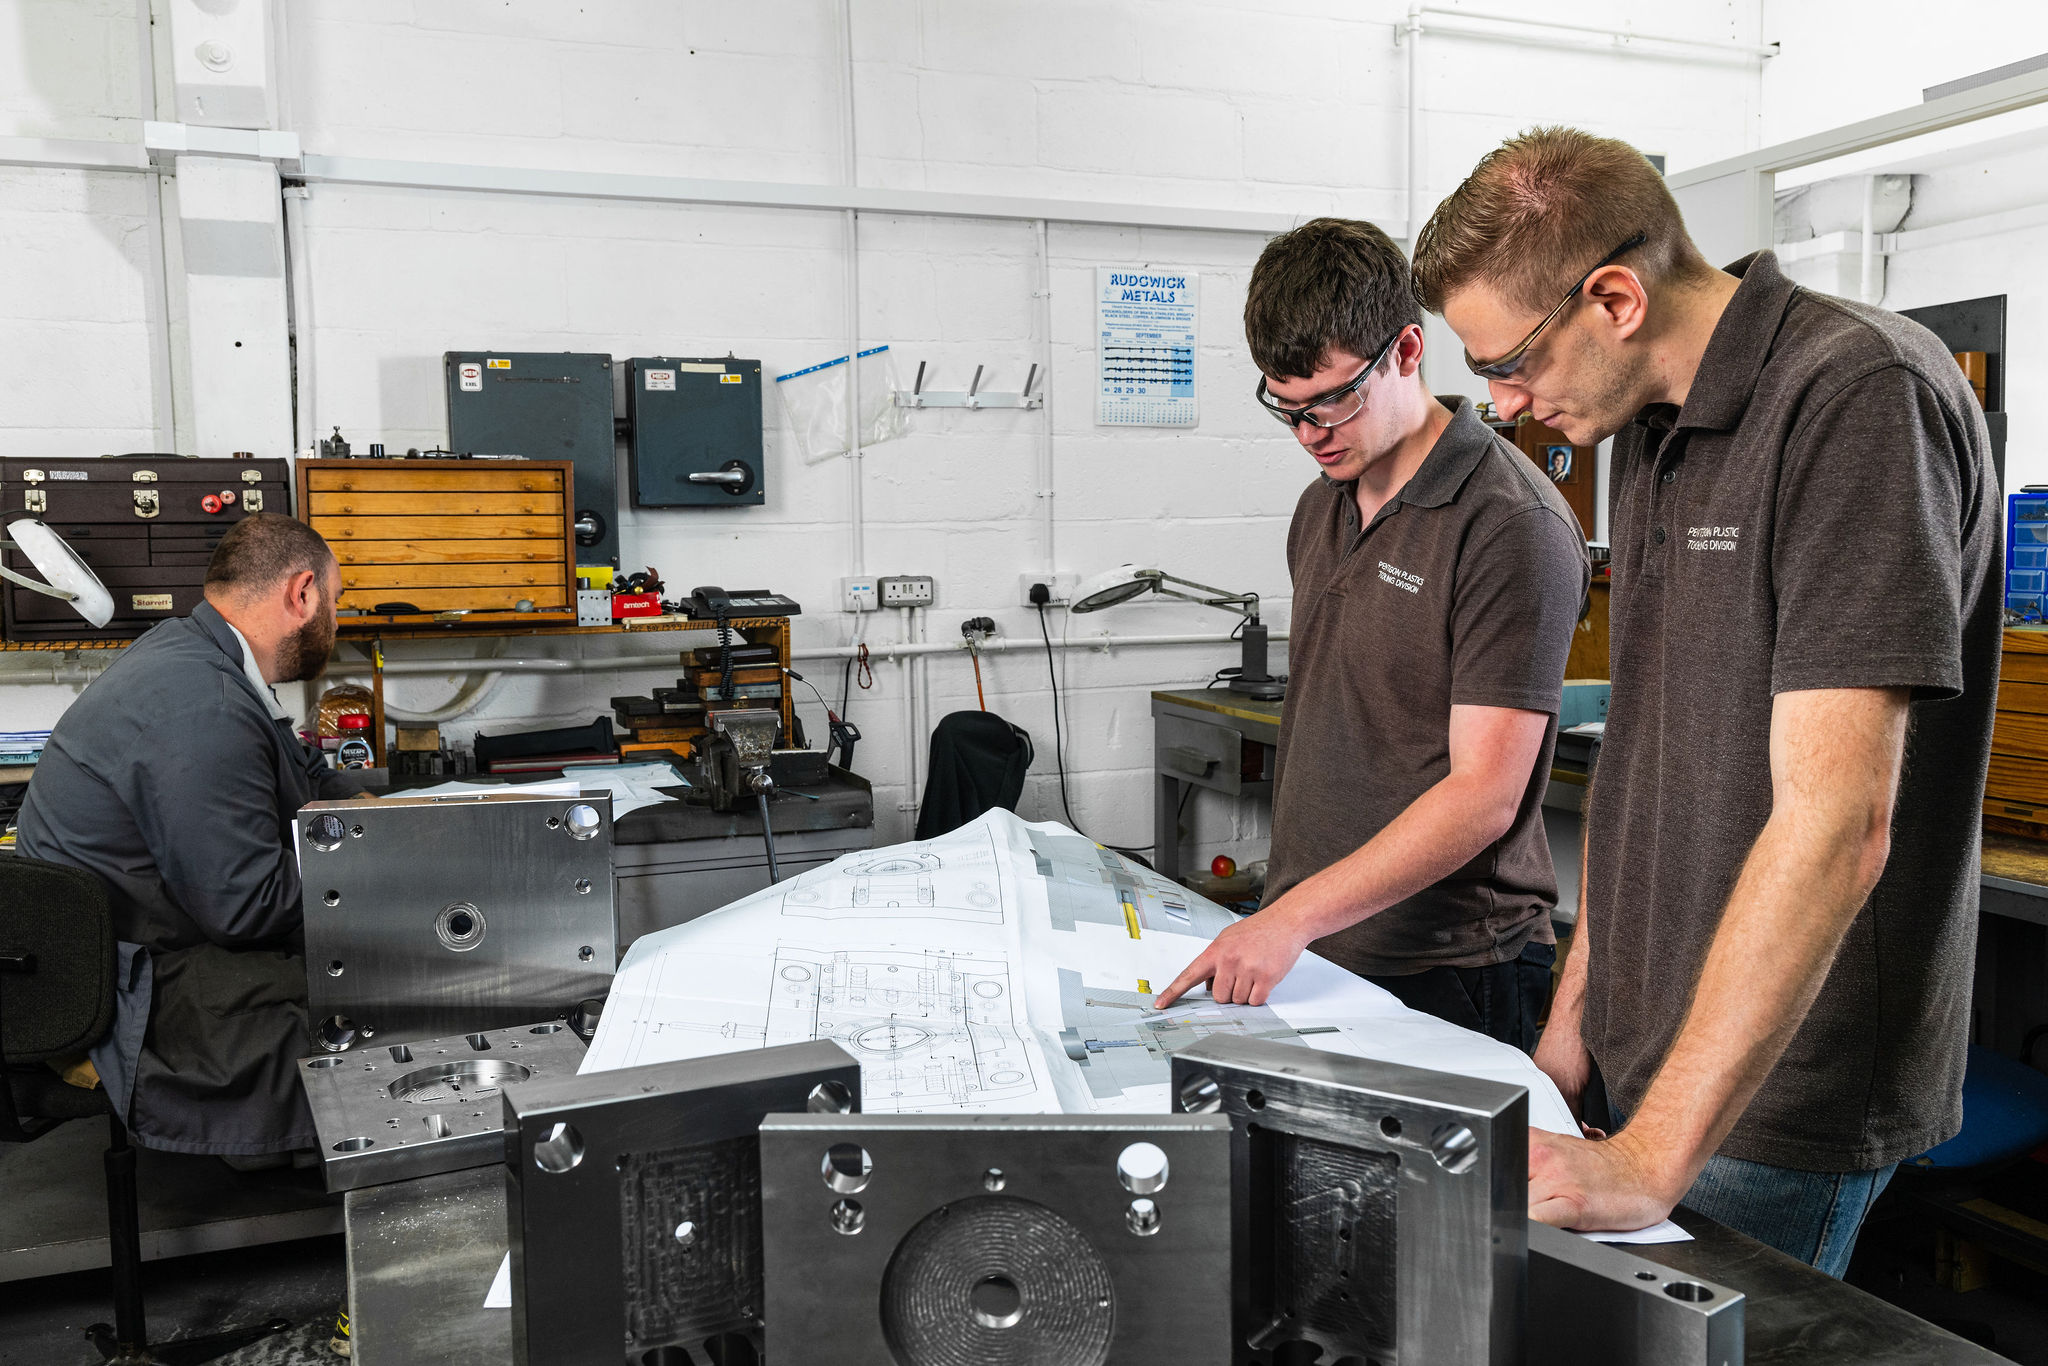
Tool Design
It is key for any tool designer to understand the manufacturing process required for producing the part they are designing; be that a plastic component that will need moulding, or the mould that will need machining. Having a full understanding of what can be achieved easily vs what will be complex to manufacture will help manage cost.
Upon commencement the designer must gather all the available data regarding the product and the tool requirements such as number of cavities, feed system, ejection method and temperature control. This information is filtered into the Tool specification sheet which will be referred to by the designer and the tool makers throughout design and manufacture.
There are many factors to consider such as the manufacturing material of the outer casing (known as Mould Base, Bolster Set or Die Set) as well as the working detail areas of the tool. Most decisions are based around the volumes required of the part to be moulded, the complexity of the parting line of the tool and the features that need to be moulded within the tool during the process cycle.
At Pentagon production is an integral part of detailing the tool specification and design principles by considering the production process and requirements at an early stage of the tool design.
The tools are generally constructed as a 3D Model of the entire tool using reverse engineering techniques after we have added shrinkage rates to the product design. This involves constructing the mould tool and moving features around the product ensuring an acceptable flow of material to the product and that all movements can be actioned in the correct sequence.
The 3D data is then exported in to 2D detailed drawings for the General Assembly of the tool and then each element is fully detailed for manufacture.
Manufacture
Senior toolmakers oversee and manage the process of making the mould tool ensuring parts are manufactured in the right order to facilitate a smooth flow through our extensive toolroom facility.
Tooling items will go through initial machining, maybe hardening, then grinding, finish machining, and sparking, while also being inspected along the way. Parts may need to be sent off for subcontract work or additional coatings. As items are progressively finished and fitted to the tool it will all come together, each part made to intricately fit and slide into place.
This is a highly skilled process utilising conventional machining techniques, CNC technologies, EDM erosion and final fitting of all of the components to exacting standards ensuring shut off faces are maintained, and any moving features will run freely when the mould tool is cold but also when the temperature control is applied in production.
Trialling
The tool will be hung in a suitable moulding press and atrial process conducted to check the tool functionality and optimise the moulding process. It may take a number of trials to achieve a production ready part as sometimes critical areas are left metal safe for final adjustment once the effect of the material shrinkage is proven.
Initial trail stages: -
T0, to check tool functionality and access the dimensional accuracy of the moulded part
T1, to access any adjustments/refinements made after the T0sample phase, at this stage samples are generally intended to be submitted to the customer for their first look.
Sampled products are measured for conformity to the drawing, this information will be collected and collated into a First Article Inspection Review (FAIR) document, if supplied with mating parts we will check and access the fit.
Once the customer has reviewed the inspection data, any out of tolerance, or metal safe sizes will be adjusted before it is re trialled. Due to the complexity of some parts this may have to be repeated a few times until it meets the fit and function requirements, but most parts are approved for production quickly.
It is always wonderful to see a tool that only started as a thought in a designer’s head turn into a working production mould tool, operating exactly as envisaged, the mechanisms thought up to achieve this working as intended and part after part falling on to the conveyor, looking just like the model you started with.
At Pentagon we take great pride in offering the full range of services that we do to complement the manufacturing process and awarding our customers the confidence to entrust us with their product.
Jake King – Tool Designer – Pentagon Plastics Group Ltd